
What You Need
- Needle-nose pliers or forceps
- Cotton swabs
- Isopropyl alcohol (rubbing alcohol)
- Silicone lubricant (for O-rings)
Step-by-Step Instructions
Step 1 — Remove the tailcap and loosen the retaining ring
Unscrew the tailcap from the body tube. Using forceps or needle-nose pliers, insert the tips into the two small holes on the tailcap face and turn counter-clockwise to loosen the retaining ring.
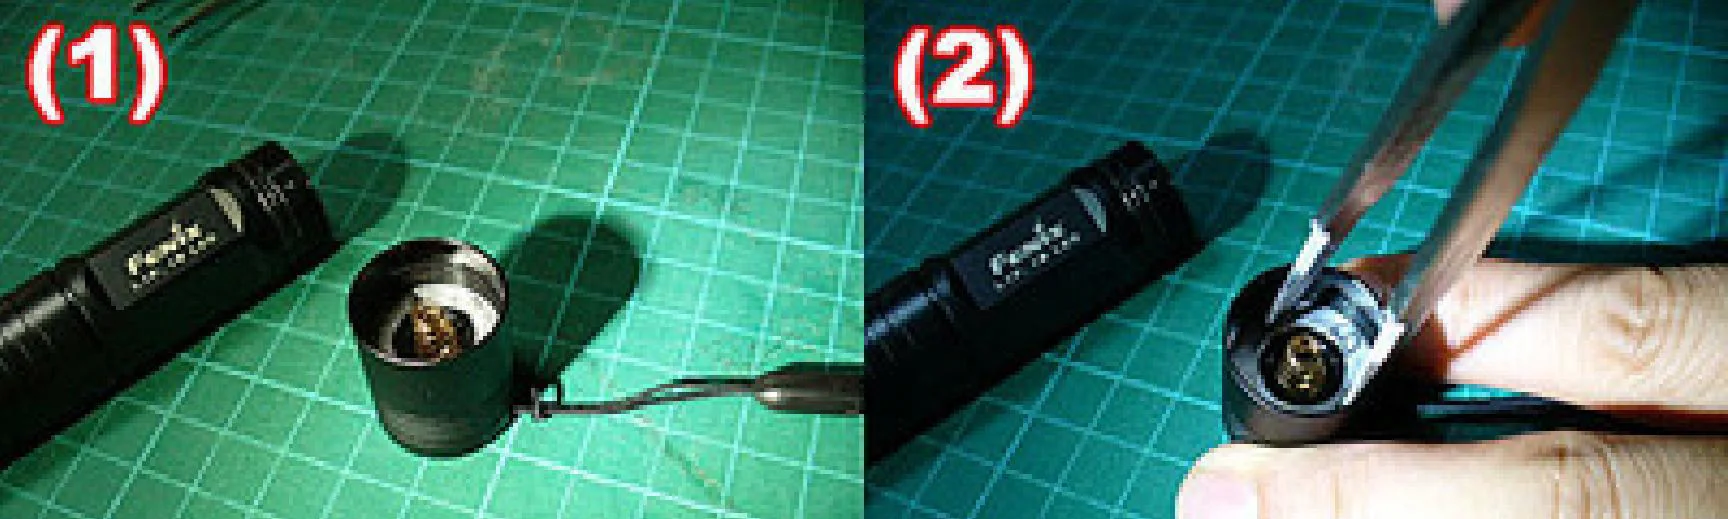
Step 2 — Unscrew the retaining ring
Continue turning counter-clockwise until the retaining ring is fully loosened. Keep the forceps firmly seated in the holes to avoid slipping and scratching the tailcap.

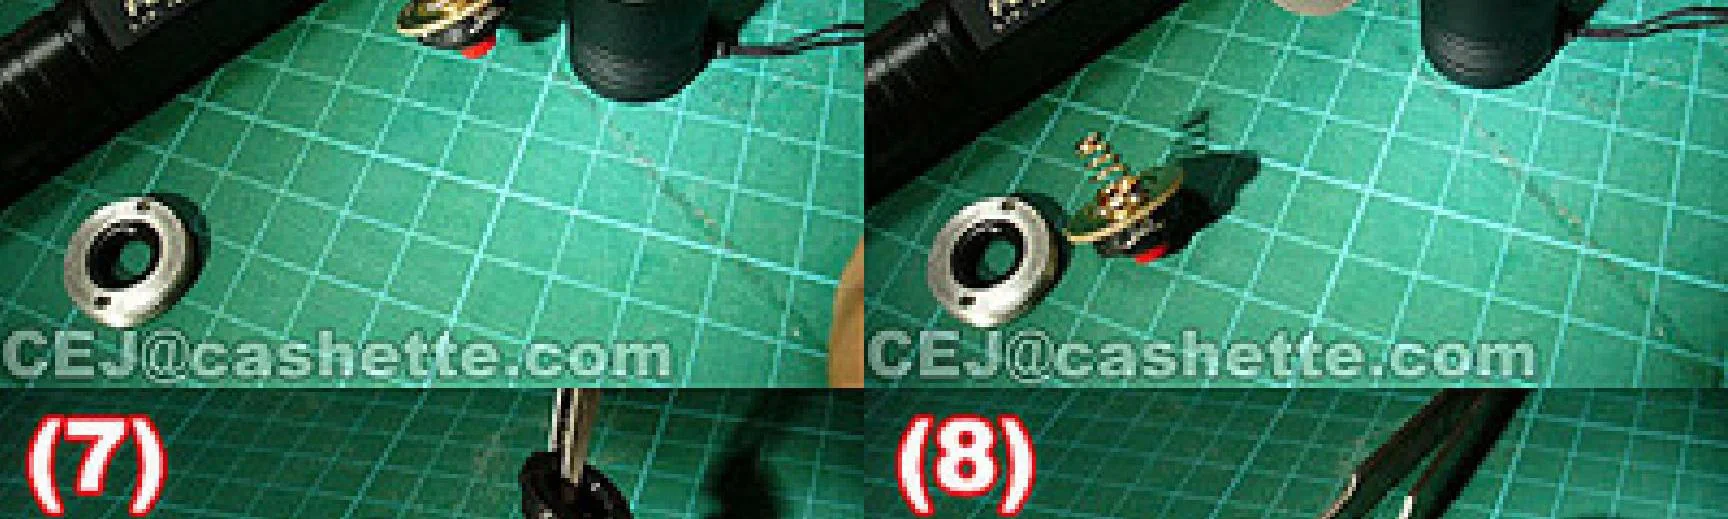
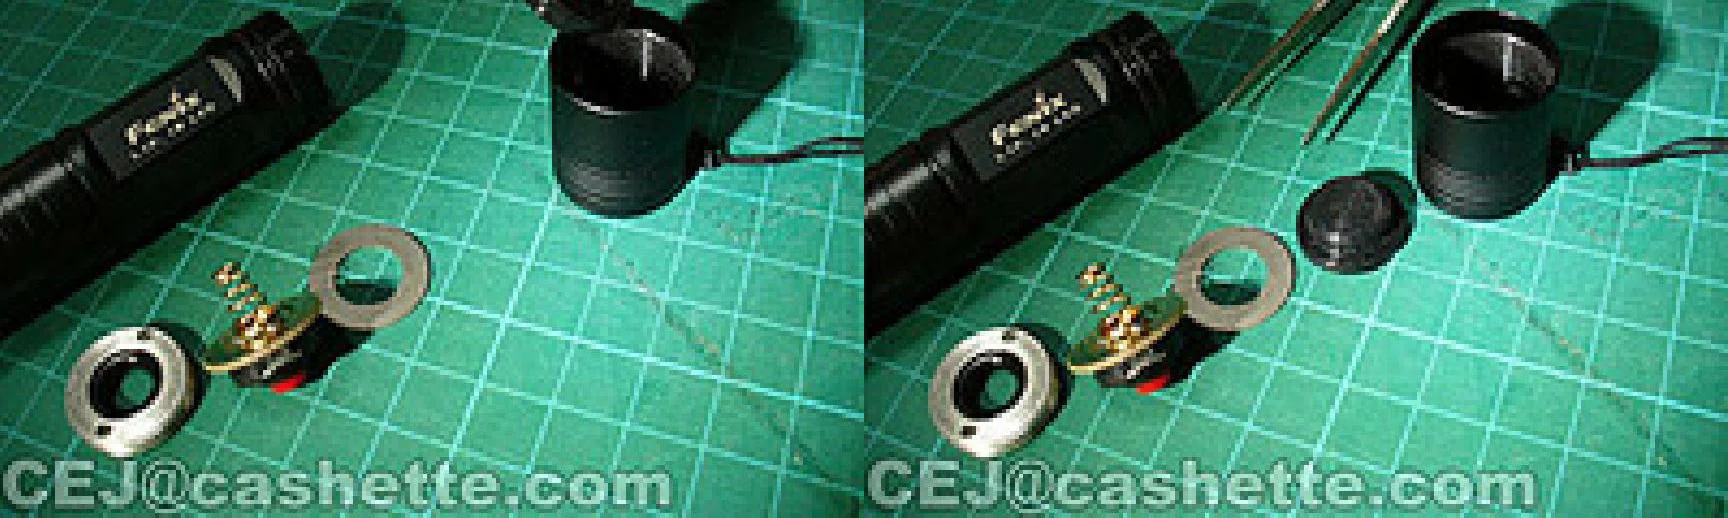
Step 3 — Remove the retaining ring and rubber boot
Lift out the retaining ring and the rubber boot (gasket) beneath it. Set them aside on a clean surface.

Step 4 — Remove the switch assembly and clean
Carefully pull out the switch assembly. Clean the contact surfaces, the inside of the tailcap housing, and the switch assembly itself using a cotton swab soaked in isopropyl alcohol. Remove any corrosion, dirt, or old lubricant.
Step 5 — Reassemble
Place the switch assembly back into the tailcap housing, followed by the rubber boot and the retaining ring. Use forceps to tighten the retaining ring clockwise until snug. Apply a thin layer of silicone lubricant to the tailcap threads and O-ring before screwing the tailcap back onto the body tube.
Tips
- Take a photo before disassembly so you remember the order of the parts.
- Do not over-tighten the retaining ring — snug is sufficient.
- If the rubber boot is cracked or damaged, contact us for a replacement.
- See the Daily Maintenance page for routine contact-point cleaning that does not require disassembly.